This guide will help in running the Automatic1111 user interface and allow you to make amazing images using the Stable Diffusion model.
Once you have launched the playground instance (see Introduction for more details on the one-click launch), you are ready to start creating images.
One of the most basic applications of using the Stable Diffusion model is you can use the model to help you generate images using text descriptions.
Using Stablematic, you can use this feature on any Stable Diffusion model or checkpoints. With your playground launched, on the top left you should see a number of tabs.
By default, you should be on the txt2img tab. This tab enables you to input text as a description for what images you want the AI model to generate for you. This description is knowing as ‘prompting’ and will affect what image the AI will generate for you. See our prompt guide and anatomy of a prompt for more tips and tricks on how to get an image closer to what you want using text prompts.
Detailed txt2img breakdownA guide breaking down the settings in the txt2img tab
The txt2img tab offers many settings. In this guide we will create a breakdown of the various settings. For a quick overview of prompt engineering (what to type in the prompt section) see: this detailed breakdown here. The below guide provides a comprehensive, all you need to know guide to the Automatic1111 UI on Stablematic.
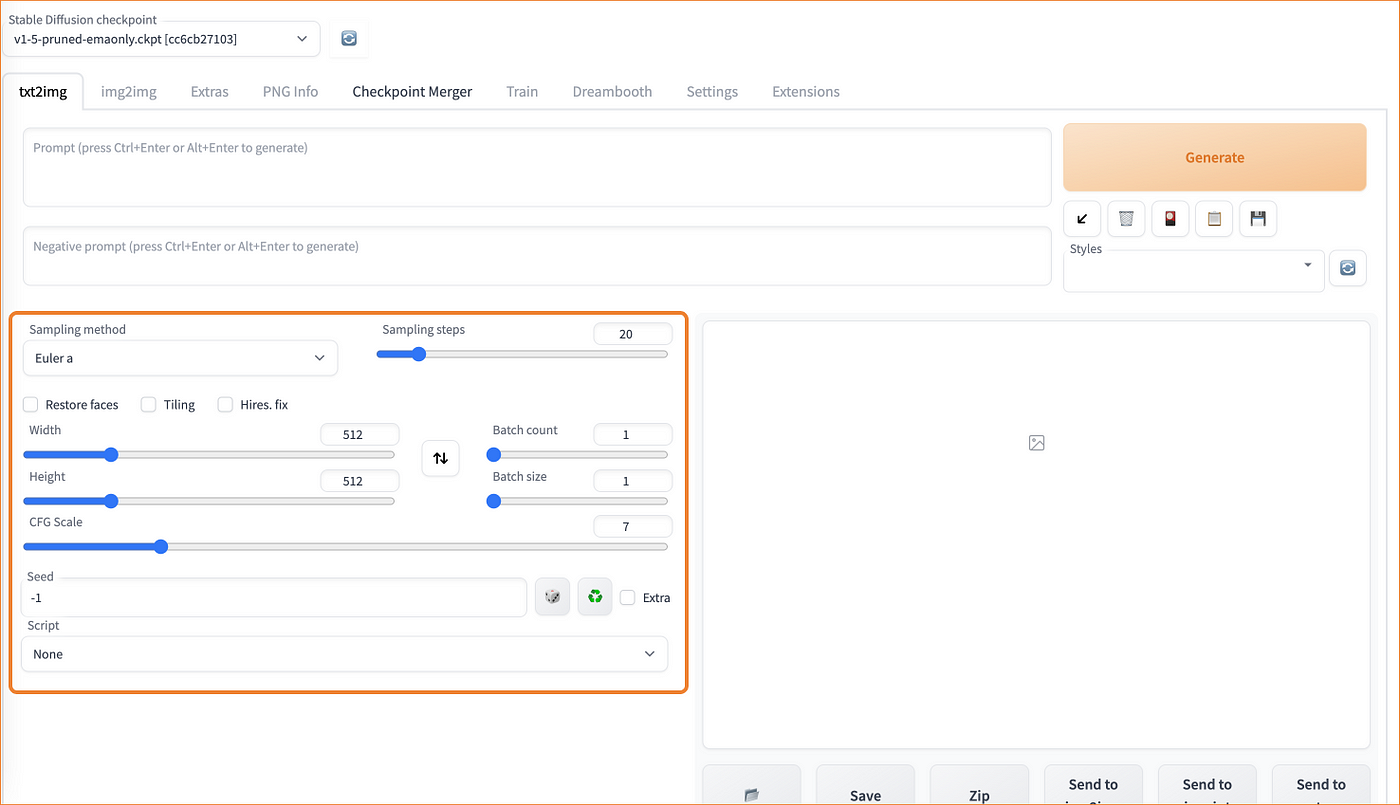
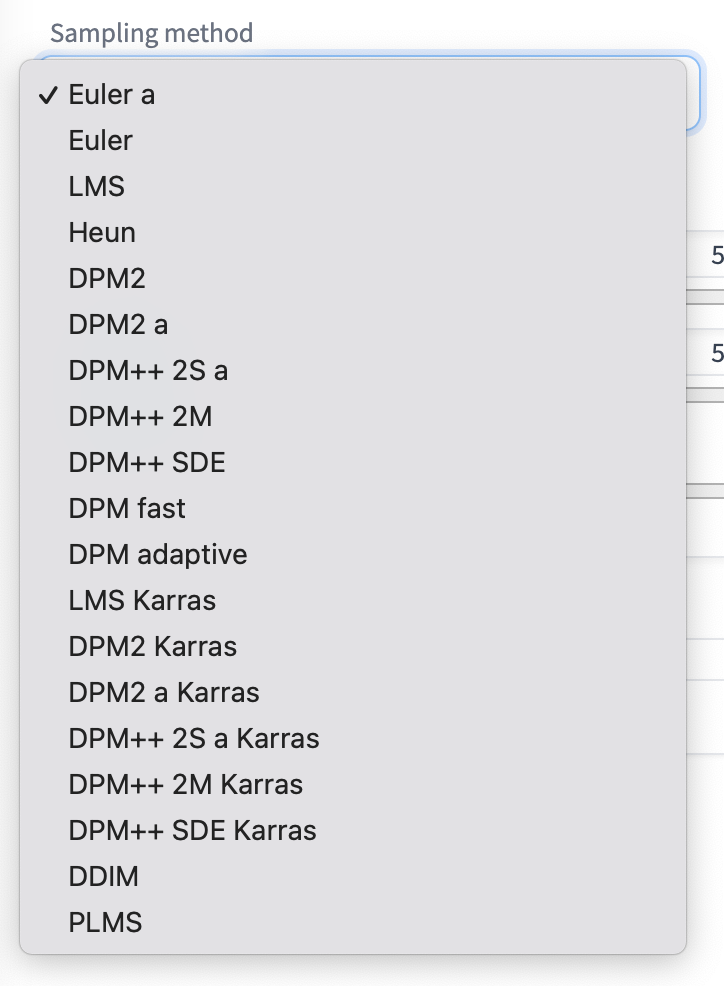
There’s a variety of sampling methods you can choose but in a nutshell they represent different methods for solving differential equations of diffusion models (Stable Diffusion being a latent diffusion model). To learn more about diffusion models and Stable Diffusion, see the notes here. They largely provide similar results with differences resulting from the numerical ‘bias’ in the differences of each equation. For a detailed breakdown of each equation (written in Python) see this k-diffusion repo.
Sampling methods effectively transform random noise in Stable Diffusion into a synthesised image with no noise. The number of sampling steps are the number of steps you want the particular method to take into creating an image of acceptable quality/noise. A more practical way of using sampling method and sampling steps is to experiment. Below is a visual guide to see some of these differences.
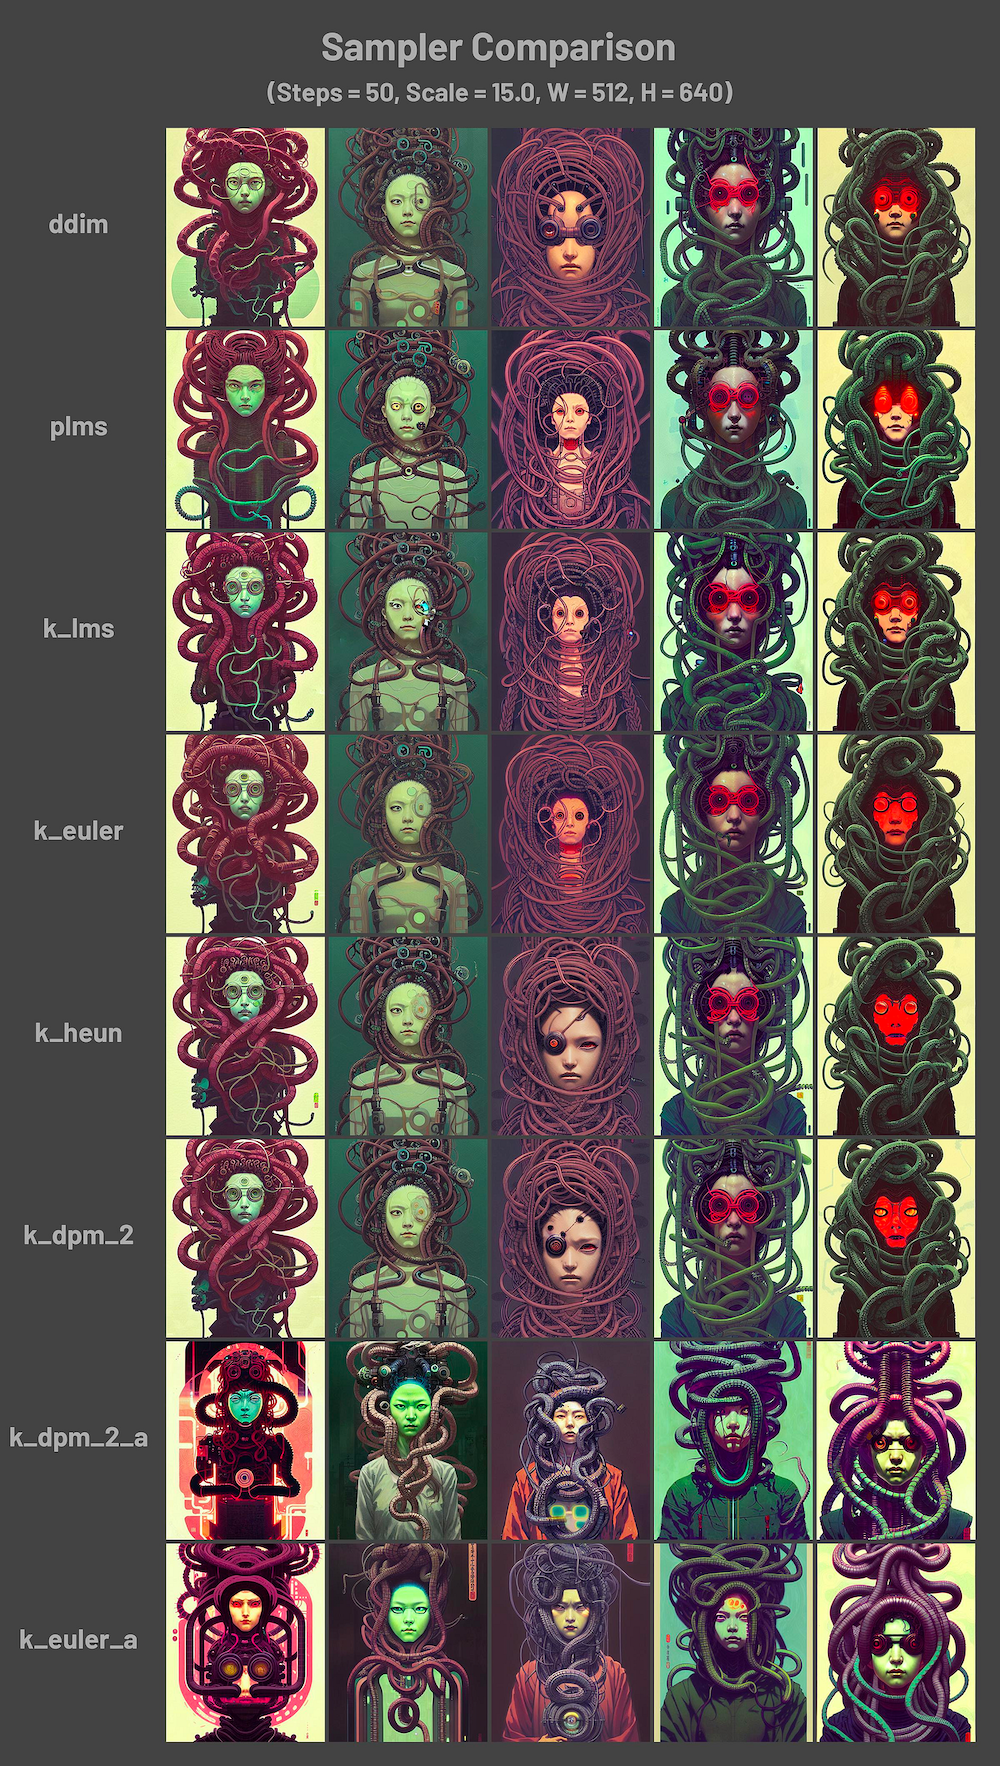
The most popular ones to take note of are the k_lms, DDIM, k_euler_a and k_dpm_2_a samplers.
k_lms is an ‘old reliable sampler’. At 50 steps, it should provide a reliable output.
DDIM is a ‘very fast sampler’. It can generate images quickly and with 8 steps does so at a super fast pace. It is a good setting for generating batches of images and for testing rapid prompt modifications. It gives a good birds eye view of how one’s prompt does across multiple seeds. If the images come up a bit garbled, increase the number of steps.
k_euler_a is a little mix between k_lms and DDIM. It too is super fast and produces great results at low step counts (8–16) but unlike DDIM, it changes generation styles a lot more. The generation at step count 15 might look very different to step count 16. They BOTH might look even more different than at step 30.
k_dpm_2_a is a very detailed sampler. It is slow compared to the samplers mentioned above but if one applies 30–80 steps, k_dpm_2_a produces very detailed images. If you want a polished image, this is the sampler to try for.
Restore faces
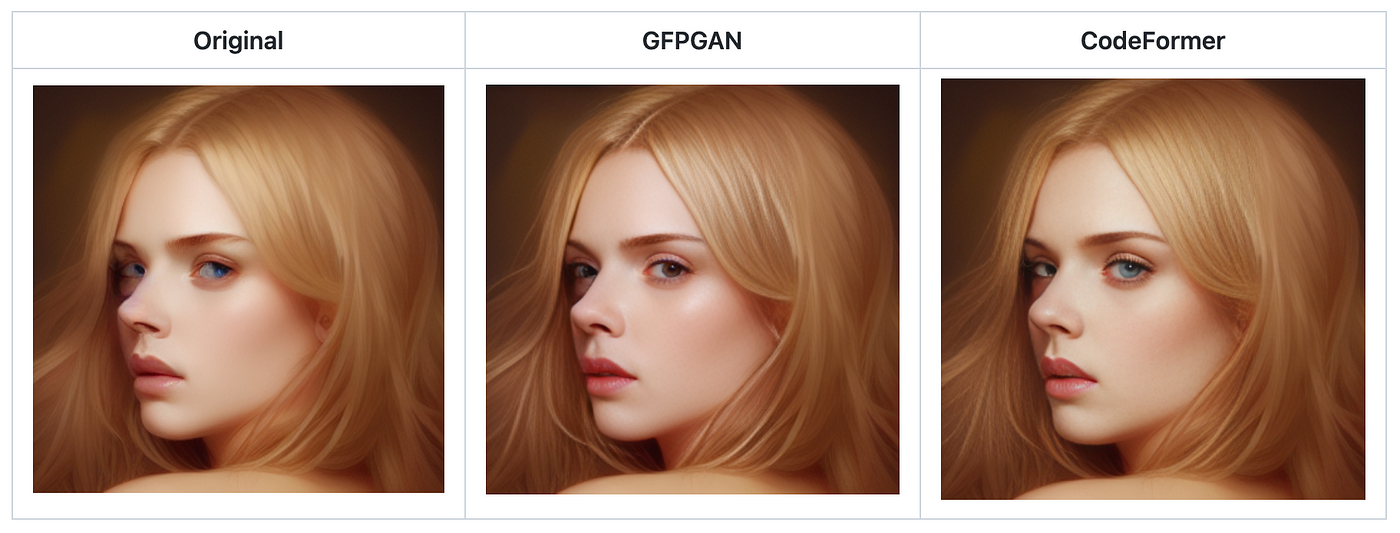
This checkbox option is to help with images where you might have faces. To improve the quality of those images, you’ll want to use this option. In the ‘Settings’ tab, under Face Restoration you’ll be able to find these set of options:

You can use these settings to choose between either CFPGAN or CodeFormer for type of Face restoration model you may want to use on your image.
Tiling
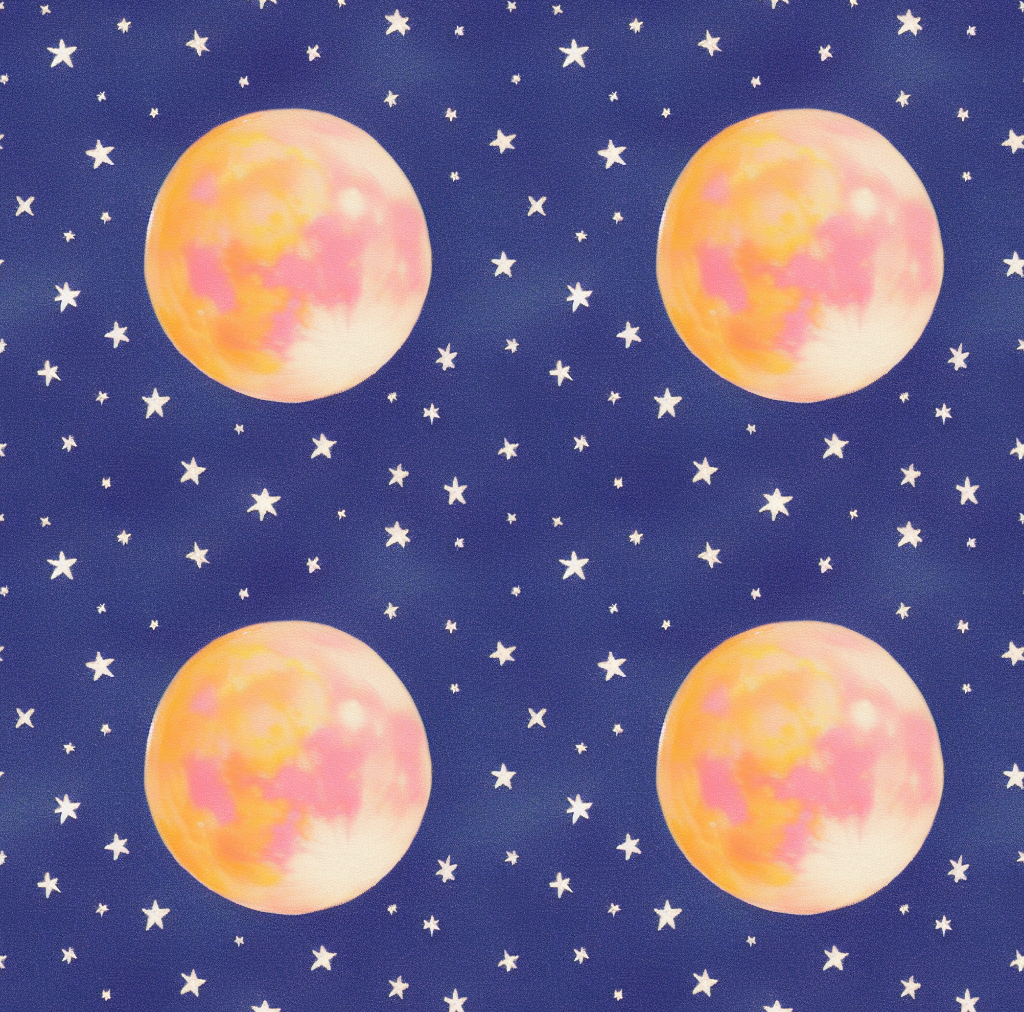
The tiling option enables one to re-use the image as a ‘tile’ for a larger image. With this option enabled, Stable Diffusion will help you generate an image that is a symmetrical piece of which you could export the image to use for background images or textures. For example with the prompt:
moon and stars
We get this tile:
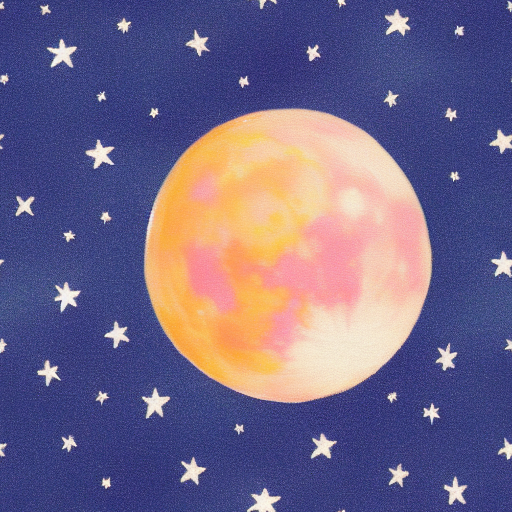
We can then download this image and make a 4x4 tile background.
Hires. fix
This is a high-resolution fix option which applies an upscaler to scale up your image. This is needed because the native resolution of Stable Diffusion images is 512x512 pixels. The image is often too small for many use cases. Using the Hires. fix enables you to first generate a small image of 512 pixels then scale it up to a bigger one.

You will see a variety of options for the upscaler. See this guide for more information. The various latent upscalers are options which scale the image in the latent space.
Hires steps: These are steps relevant to latent upscalers. It relates to the number of sampling steps after upscaling the latent image.
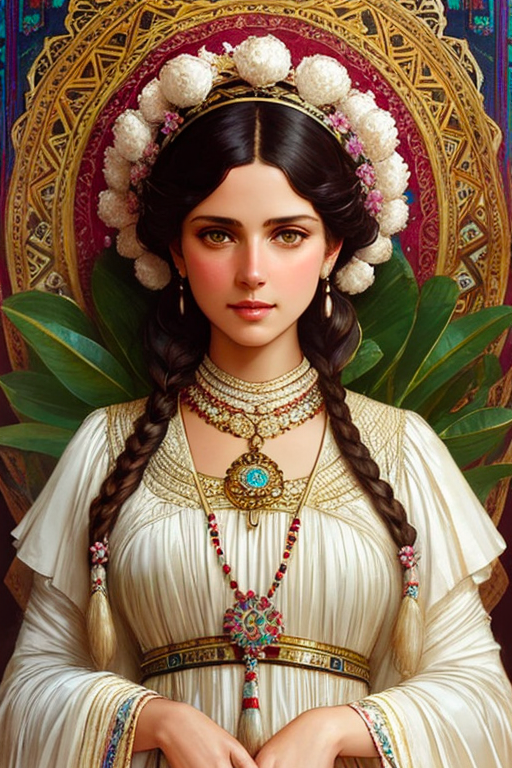
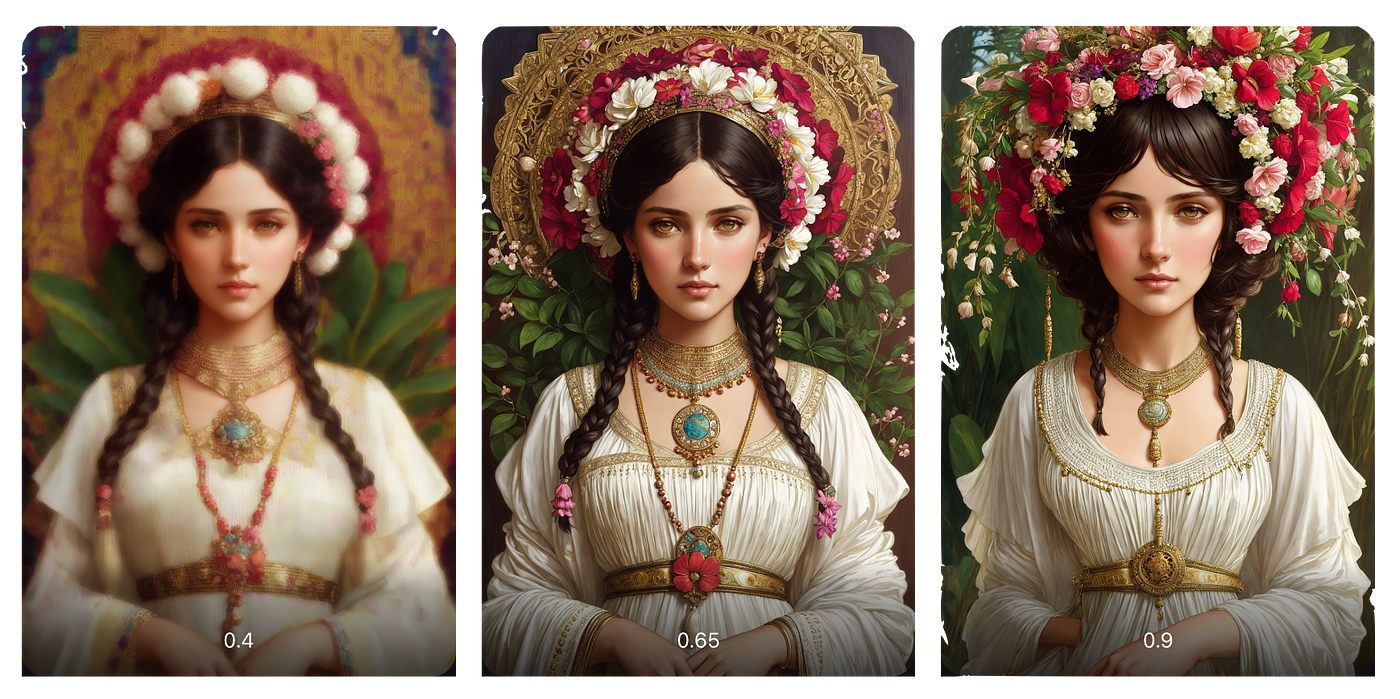
Denoising strength: These are again relevant only to latent upscalers. It controls the noise added to the latent image before performing the Hires sampling steps. For a breakdown of how this roughly works, see this guide. As an example, see the below image upscaled with various denoising strengths:
Upscale factor controls how many times larger the image will be compared to the original size. For example, setting it to 2 scales a 512-by-768 pixel image to 1024-by-1536 pixels. Alternatively, one can specify the values of “resize width to” and “resize height to” to set the new image size manually.
Width and Height
The width and height you desire for the image. The base size is 512 x 512 pixels.
Batch count and Batch size
The batch count determines the total number of batch iterations performed. The maximum size here is 8. The batch size relates to the number of images you want generated in each batch iteration. The maximum size here is 100. The total number of images generated will be the batch count multiplied by the batch size. Batch count x Batch size = Total number of generated images.
CFG Scale
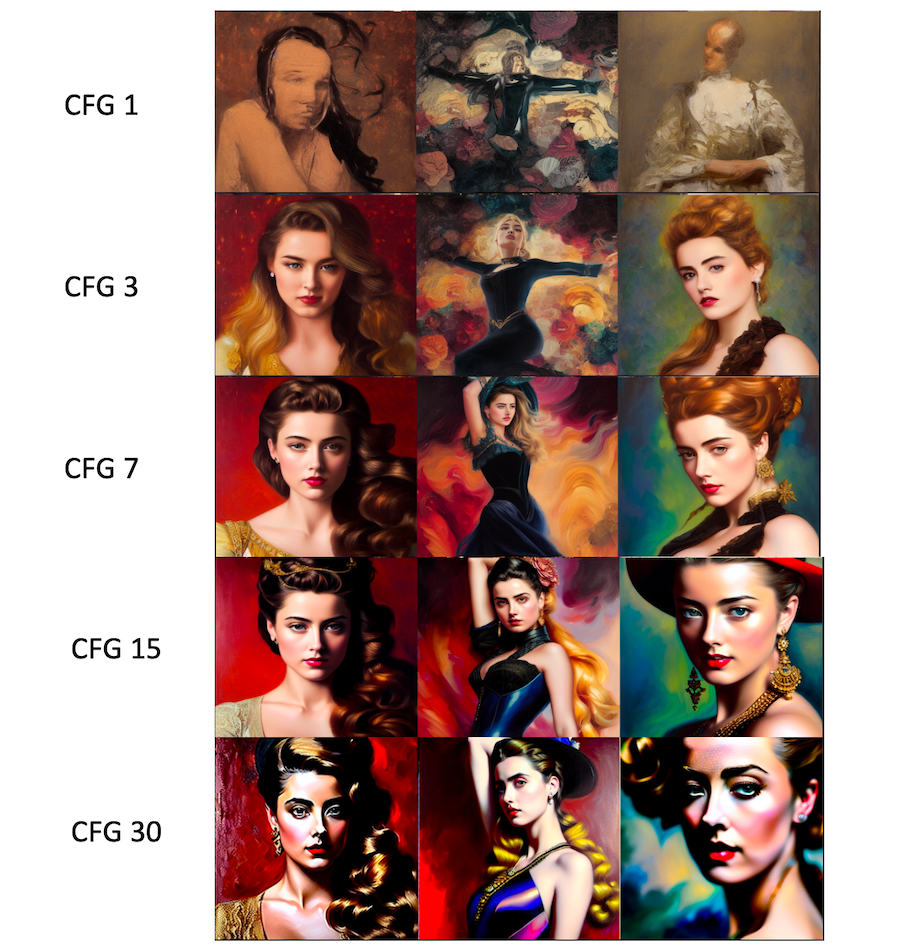
The CFG scale (Classifier Free Guidance scale) is a parameter that affects the level of similarity between the generated image and the text description used to create it. The value can range from 1 to 30. The higher the cfg scale, the more closely the generated image will resemble the prompt, and vice versa. The images below show the effect of changing CFG with fixed seed values.
Seed
The seed number affects how random the image generated is. By default it is set to -1 meaning each generated image will be completely random. If the same seed value is used, it will produce the same results every time. By fixing the seed, you’ll be able to generate the same image each time. This allows you to modify the prompts of the image. For example, if you generated this image:
photo of woman, dress, city night background
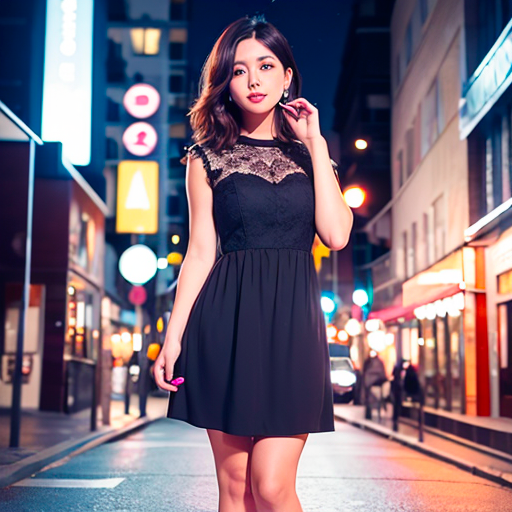
And you then wanted to add bracelets to her wrists, you can do so by re-using the seed value. The seed value is in the log message below the image canvas.
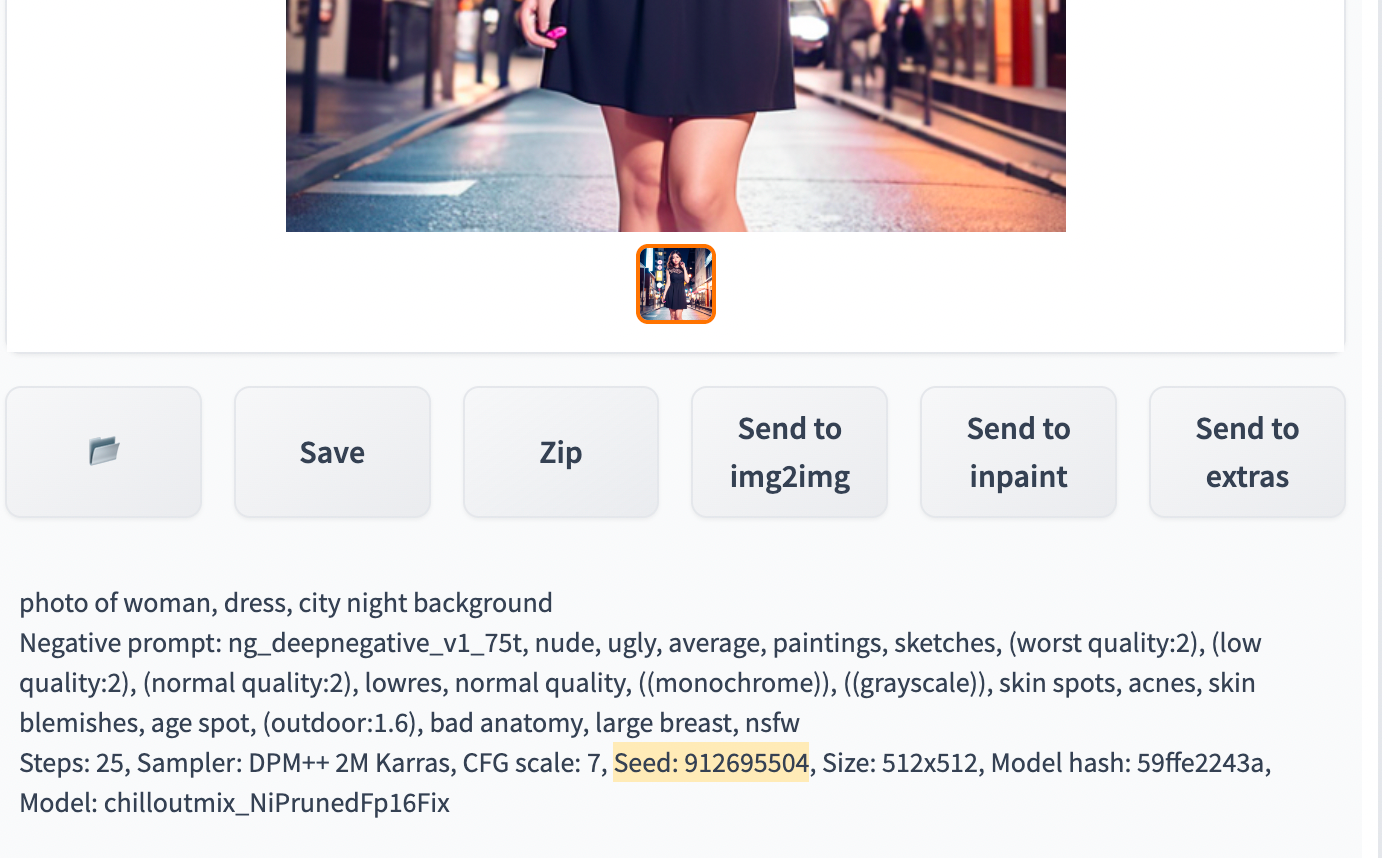
With the seed, you can reuse this in the seed value box or you can click on the recycle icon button to copy the seed value.

By doing so, if you now add ‘bracelet’ to the prompt:
photo of woman, dress, city night background, bracelet
You’ll get a similar image but with bracelets on her wrists.
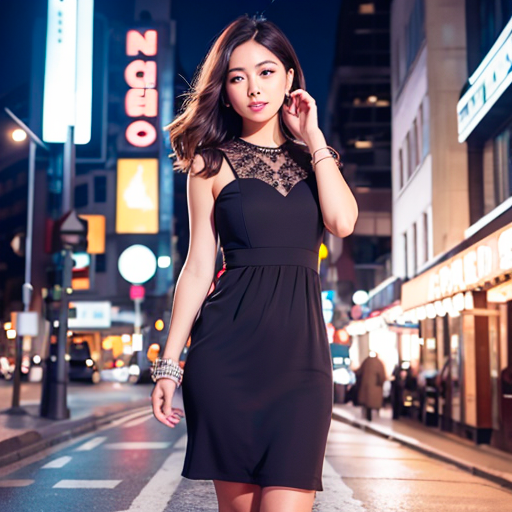
Note: the scene may change slightly if some of the keywords are ‘strong’ enough to change the composition.If you want a random seed i.e. reset to the default setting, you can do so by clicking the dice icon.

There are also some extra seed options if you tick the checkbox.

The purpose of the extra seed options is the variation seed.
This enables you to add an additional seed value. It enables you to mix between two images you might have generated. One would be the seed and the other the variation seed.
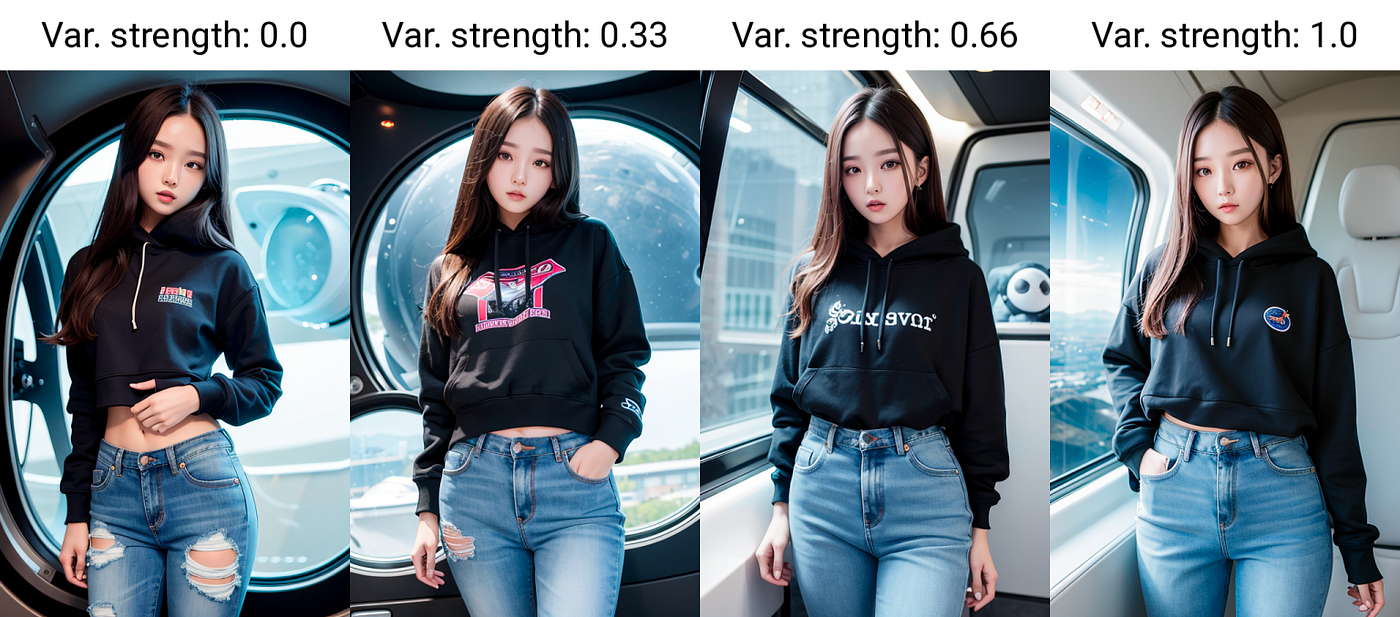
The variation strength is the degree of interpolation between the seed and the variation seed. Setting it to 0 uses the seed value. Setting it to 1 uses the variation seedvalue. As an example, of this, imagine you have 2 images generated from the same prompt and settings. They each have their own seed values, 1 and 3.
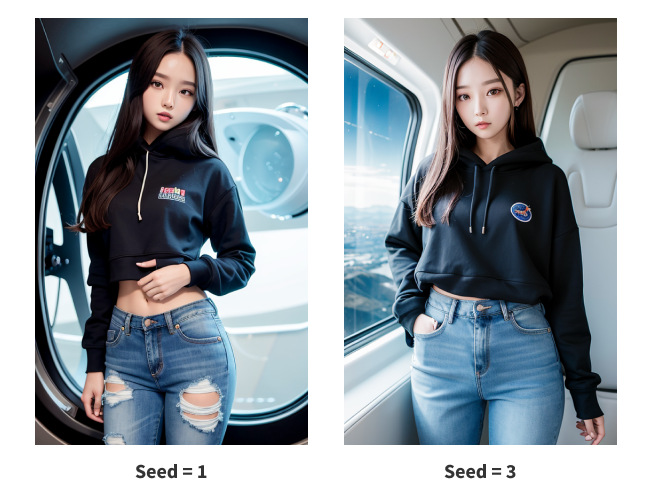
If you would like a blend of these two images, you would set the seed to 1, the variation seed to 3, and adjust the variation strength from values between 0 and 1. If it is closer to 0, it would resemble the seed image. If it is closer to 1, it would resemble the variation seed image.
Script
By default no script functionality is enabled. You are able to add your own scripts. They are general extensions that adds functionality. The default ones included are three options: ‘Prompt Matrix’, ‘Prompts from file or textbox’ and ‘X/Y/Z plot’.

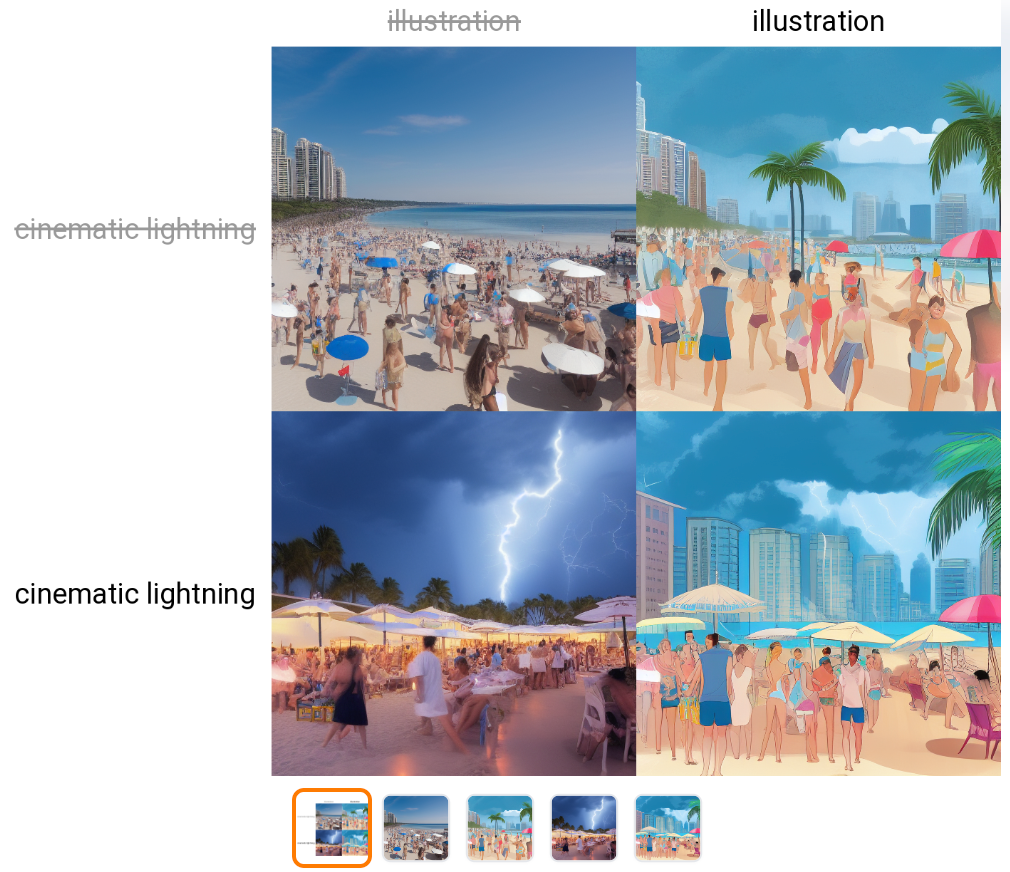
Prompt matrix enables you to seperate and combine keywords of a prompt for generating an image using vertical bars (‘|’) instead of commas (‘,’). The main benefit for doing so, is you would be able to generate a matrix in which you can compare the prompts with and without certain keywords as generated by the matrix. For example, if you would normally generate an image with the prompt:
“a bustling beach club in a modern metropolis, illustration, cinematic lightning” You would get:
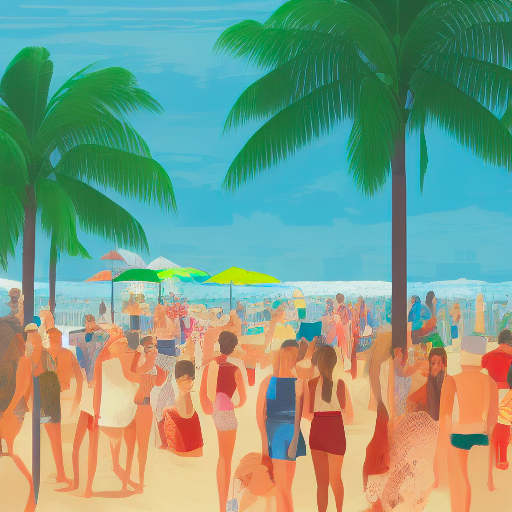
Using prompt matrix, you could instead use to see what the images would be like if it had the ‘illustration’ keyword, if it didn’t have the ‘illustration’ keyword etc:
“a bustling beach club in a modern metropolis | illustration | cinematic lightning”
Prompts from file or textbox enables you to use the same prompt but to change one keyword. By inputting that one keyword difference, you can generate a number of combinations and have it generated at the same time rather than repeat it. For example if I wanted to see what Mario would look like with different mushrooms. I could input a whole bunch of prompts into the textbox from the Script:
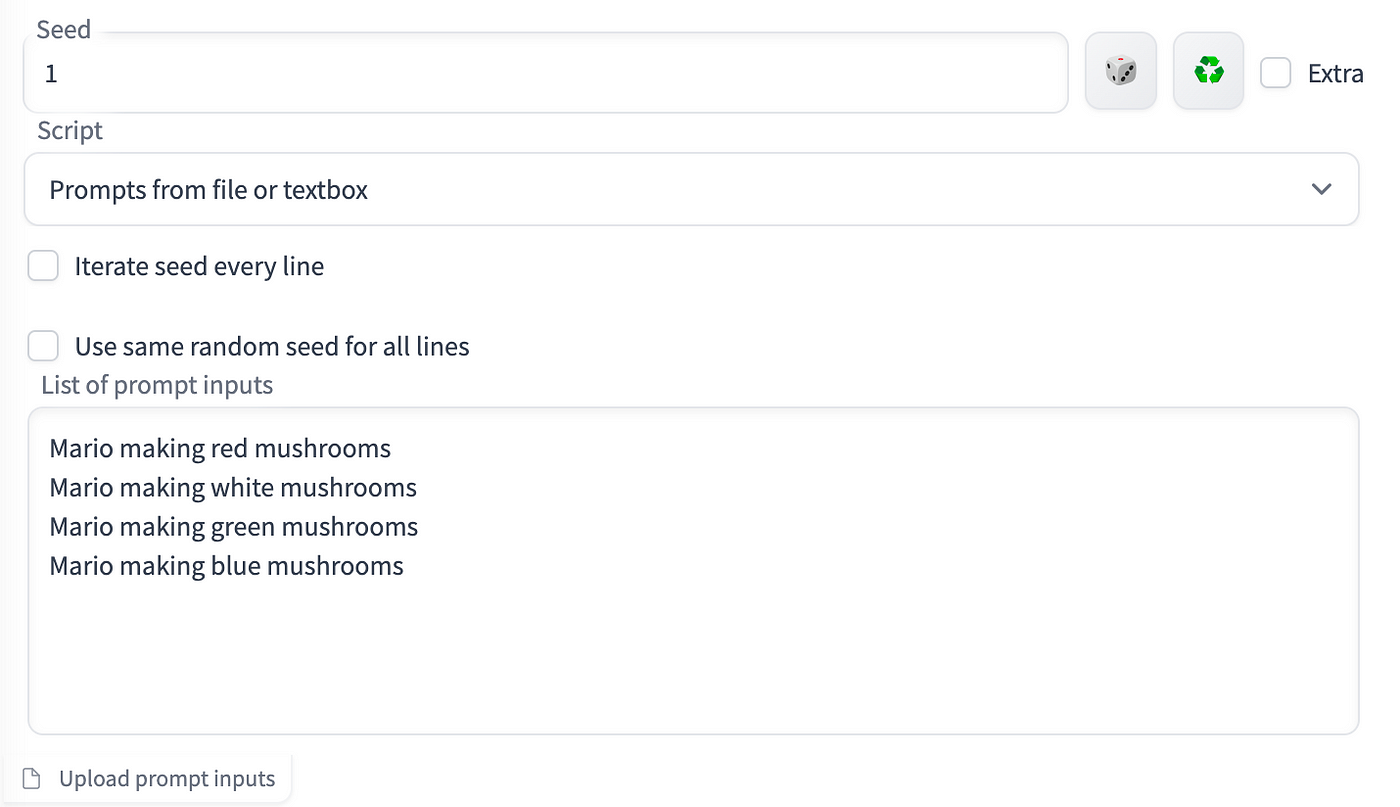
I would then get a series of images generated at the same time based on these lines of prompts.

The X/Y/Z plot enables you to create multiple grids of images with varying parameters. X and Y are used as the rows and columns, while the Z grid is used as a batch dimension.
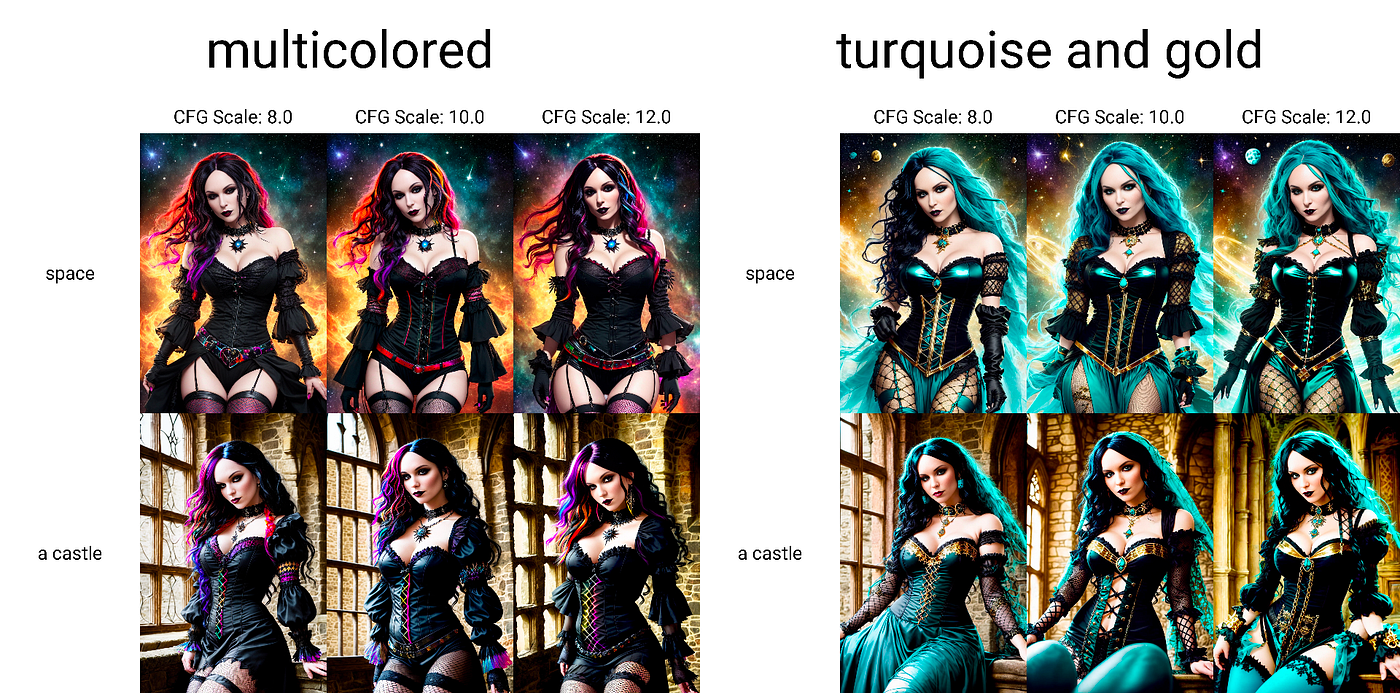
Select which parameters should be shared by rows, columns and batch by using X type, Y type and Z Type fields, and input those parameters separated by comma into X/Y/Z values fields. For integer, and floating point numbers, and ranges are supported. Examples:
- Simple ranges:
- 1-5 = 1, 2, 3, 4, 5
- Ranges with increment in bracket:
- 1-5 (+2) = 1, 3, 5
- 10-5 (-3) = 10, 7
- 1-3 (+0.5) = 1, 1.5, 2, 2.5, 3
- Ranges with the count in square brackets:
- 1-10 [5] = 1, 3, 5, 7, 10
- 0.0-1.0 [6] = 0.0, 0.2, 0.4, 0.6, 0.8, 1.0
Prompt S/R
Prompt S/R is one of more difficult to understand modes of operation for X/Y Plot. S/R stands for search/replace, and that’s what it does — you input a list of words or phrases, it takes the first from the list and treats it as keyword, and replaces all instances of that keyword with other entries from the list.
For example, with prompt a man holding an apple, 8k clean, and Prompt S/R an apple, a watermelon, a gun you will get three prompts:
- a man holding an apple, 8k clean
- a man holding a watermelon, 8k clean
- a man holding a gun, 8k cleanThe list uses the same syntax as a line in a CSV file, so if you want to include commas into your entries you have to put text in quotes and make sure there is no space between quotes and separating commas:
- darkness, light, green, heat - 4 items - darkness, light, green, heat
- darkness, "light, green", heat - WRONG - 4 items - darkness, "light, green", heat
- darkness,"light, green",heat - RIGHT - 3 items - darkness, light, green, heat